
Build your own block chain in 15 minutes on Node-RED using Node.js, JavaScript, Cloudant/CouchDB on a free IBM Cloud account…

Note: To do the tutorial you need a free Bluemix (IBM PaaS Cloud) account. You can obtain one here and the raw file (JSON) for this NodeRED flow is here.
Tutorial Objective
In this exercise you will generate a small block-chain implementation on your own. All you need is a free IBM Cloud account and some very basic programming skills (JavaScript). After you’ve completed the tutorial you’ll have a complete in-depth view how block-chains work.
Refresher – How Bitcoin consensus works
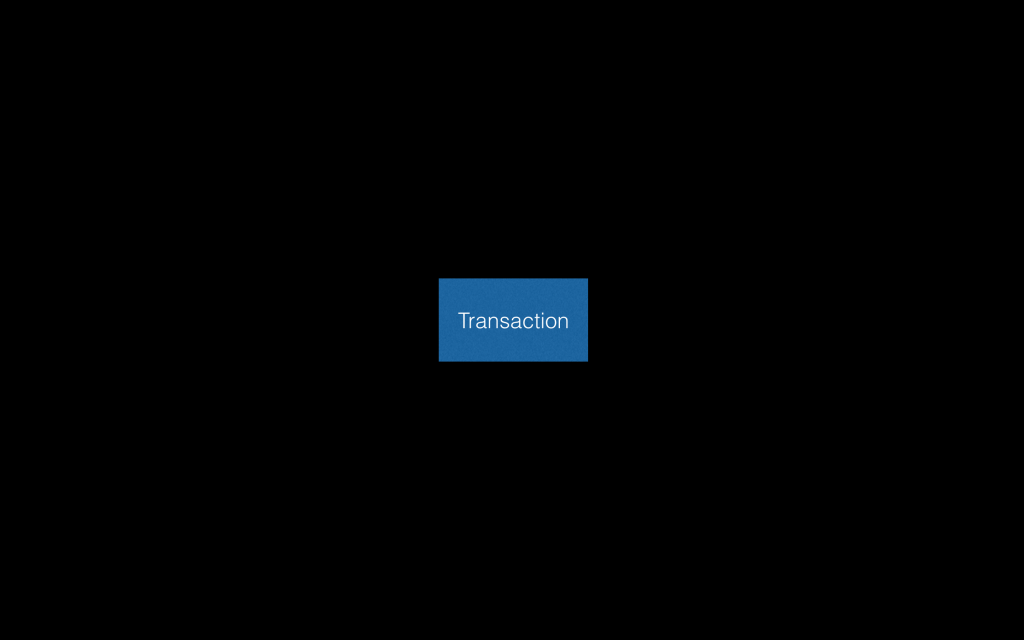
Let’s consider a transaction (or any arbitrary string) you want to securely store on a block chain.

In order to do this (so that the block chain accepts your transaction) you have to find (compute) a cryptographic token – a nonce – matching your (any only your) transaction (string).
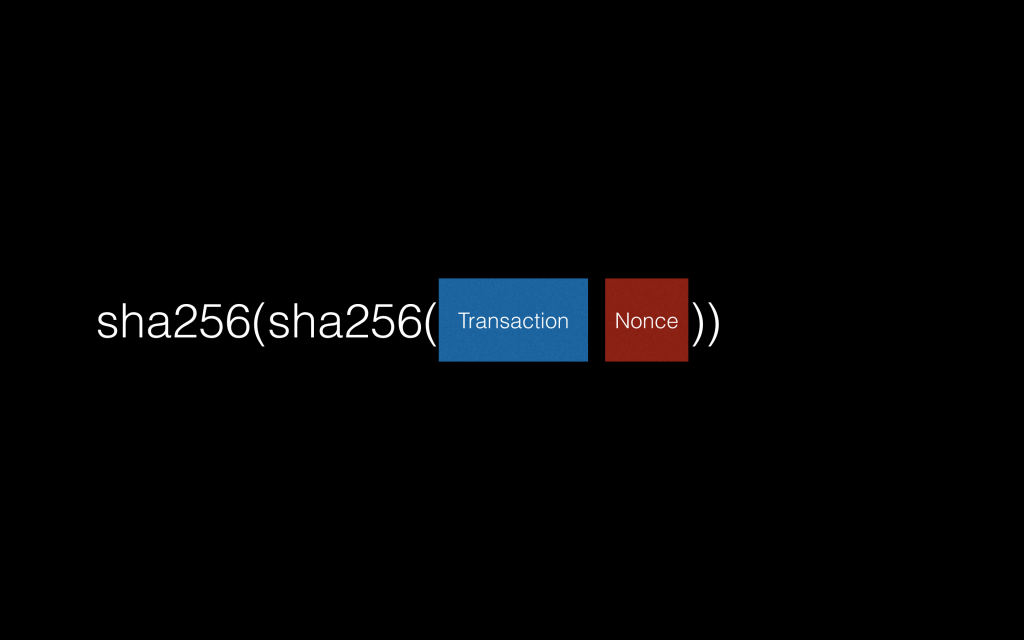 So in Bitcoin this is done by applying the sha256 hash function twice and…

…try different nonce values until you find a hash value starting with a number of d zeros. In Bitcoin d is called difficulty and is varied to achieve a constant block rate of 10 minutes. In other words, the chance of finding a nonce that generates a hash value for your transaction with d leading zeros decreases with increasing d. Therefore the computational power needed to find a valid bitcoin block also increases with d. Since the aggregated computational power of all bitcoin peers varies (but continuously increases) parameter d is automatically adjusted to obtain a constant block rate of one block every 10 minutes.
 So congratulations, you’ve understood the so called “proof-of-work” algorithm. Since finding a nonce is computationally intensive and validating if a transaction+nonce creates a hash code with d starting zeros can be done in milliseconds you have the asymetric cryptographic property that creating a transaction is complex but validating a transaction is easy.
It is interesting to know that the Bitcoin peer-to-peer network currently has a computing power of 19881622 Petaflops – in contrast the fastest supercomputer in the world only has 93014.6 Teraflops.
Let’s create our own hashing algorithm in JavaScript
Since JavaScript out of the box doesn’t provide access to the SHA256 hash function we’ll implement one on our own as formally described as follows:

Don’t be scared, basically what this algorithm does is to take the ASCII value of each character in the string and sum it up. Afterward the same is done for the same string but with the last character removed – and so on – recursively – until there are no more characters left.
So this can be easily implemented in JavaScript:

Let’s turn this hash function into a proof-of-work algorithm

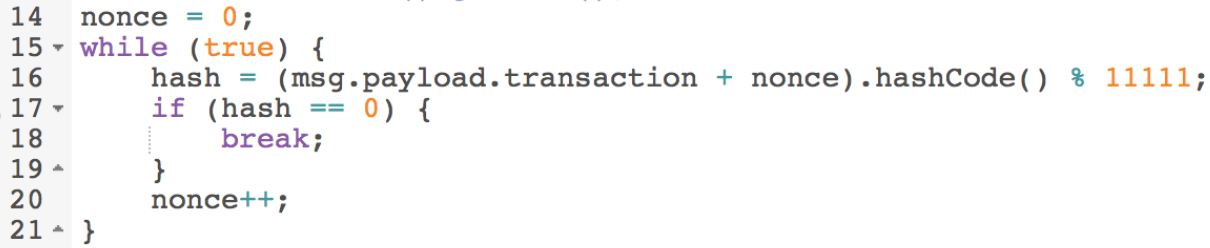
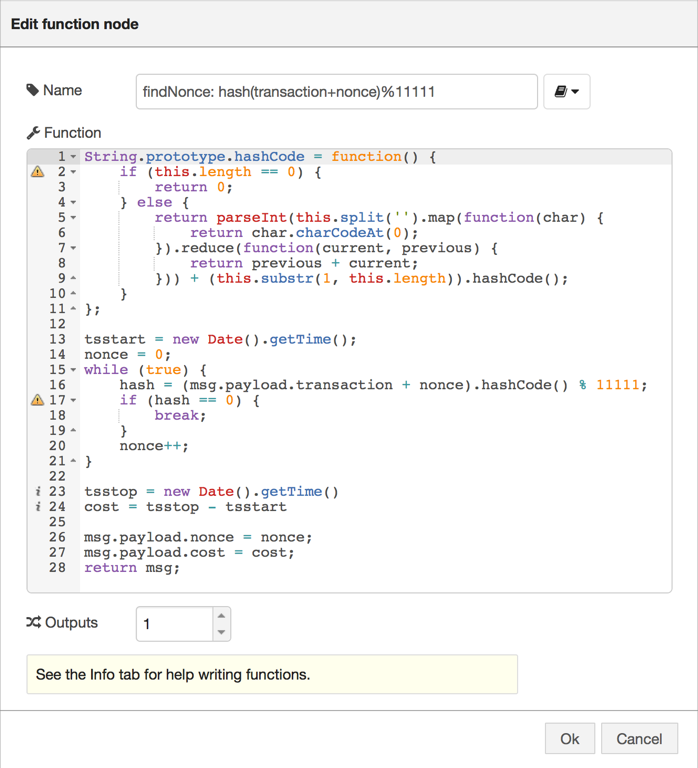
So we will use this hash function in order to create a proof-of-work algorithm by just hashing our string together with a nonce and calculating a modulo operation. We change the nonce until we find one leading to zero. In JavaScript this will look something like this (note that msg.payload.transaction accesses the JSON property within NodeRED using OGNL):
So once we’ve calculated our nonce we are done, the only thing is to pour this into some sort of WebService that we don’t have to install anything on our machine. This can be done very easily using NodeRED:

This basically creates an HTTPS endpoint on your NodeRED instance listening to the /createTransaction endpoint URL. The only parameter you have to provide is “transaction” – the actual transaction string – and it will return the generated nonce and the computational cost – this is implemented in the JavaScript function in the middle and looks like this:
Now just run a little test and see whether it works: 
Submitting, verifying and storing a transaction into Cloudant/CouchDB
Since most block-chains are peer-to-peer networks we will simulating this by creating another HTTPS endpoint accepting transactions and corresponding nonce values, verifying them and in case correct, storing them to a data base.

The “submitTransaction” endpoint takes transaction and nonce as parameters and using the following JavaScript function we’ll check weather the transaction is valid or not and add this finding as status code to the “msg” JSON object flowing through our flow:

We split the flow after this function and basically return the status code back to the caller:

On the other branch of the spit we use the switch function to decide whether we want to let the message pass through or not based on the status code:

If accepted, we just store it in Cloudant/CouchDB, here is what’s necessary for doing that:

Pulling all together
Now we have all ingredients we need to implement a block chain consensus protocol. We can generate nonce values from transactions and we can submit, verify and store transactions to a data base. Most of block chains implement a sort of peer-to-peer protocol, but for sake of simplicity we’ll omit this step and hard-code the distribution list of participating peers. So now it’s time to convince a colleague or friend to implement the very same process in his Bluemix account. 
And guess what? We can implement this just as an additional endpoint within NodeRED. We take transactions and corresponding nonce values on the endpoint “distributeTransaction” and send them to all submitTransaction endpoints of all known peers. Just update the two http request nodes to point to the corresponding endpoints, one has to be yourself because you also wanna store the data in your data base or block chain respectively. In the second node just enter the endpoint of your peer:

So as an example this might look like this:

So once you’ve hit the publish button again and call “distributeTransaction” with a transaction string and a corresponding nonce value you will see something like this…

…and in addition to that you should see the transaction being stored in Cloudant/CouchDB:

Add an optional little user interface
So in case you want to add a little user interface you can do this in NodeRED straightforward, just add another http endpoint and use the template node in order to create the HTML from:


Conclusion
So as you can see implementing a block chain is very easy – at least for a learning and demo purpose. You should now have completely understood the concept of proof-of-work and distributed consensus.
